CPU Bottleneck Calculator: Fix Games that Stutter
So, you have used the bottleneck calculator, and bam! It shows a CPU bottleneck of over 40%. Bad, right? Yeah, it is, but do not freak out! You can still get your PC running smoothly—even with a severe bottleneck—without spending a fortune.
This could not only save money but also fewer landfills, which is environmentally friendly by the way. If that sounds good, you’re in the right place. This article will explain how to deal with a CPU bottleneck even if you are a beginner.
My PC was getting old. And while I could use an upgrade, my GPU was the real problem. I grabbed a used RTX 2080 Super, fired up Red Dead Redemption 2, and guess what? Stuttering galore. Here’s the deal—when you have a CPU bottleneck, it’s not just lower frame rates that ruin your experience.
The real issue is that frame rate dips cause stuttering, which messes up the gameplay far more than a consistent 30 FPS.
Why Does This Happen?
Your GPU needs help from the CPU to tell it what to render called draw calls. If your CPU can’t keep up with sending these instructions, your GPU sits there waiting, causing stutters, especially during intense tasks like explosions or heavy physics simulations. And if you’re playing multiplayer games, the CPU has even more work to track all the players!
The Fix: Tweaking Game Settings
Turning down graphics settings seems like the obvious solution, right? Not quite. For CPU bottlenecks, you might want to turn up certain settings—like screen resolution or texture quality—to give your GPU more to do and lighten the load on your CPU.
Here’s where to start:
- Increase Screen Resolution: If you’ve got a 2K or 4K monitor, great. If not, many games offer a “resolution scale” setting to push higher resolutions even on a 1080p display.
- Turn Up GPU-Intensive Settings: Things like texture quality, anti-aliasing, and shadows can push more work onto your GPU, helping balance the load.
- Monitor Performance: Use tools like MSI Afterburner to check CPU and GPU usage. You want your GPU running at around 99% and your CPU hovering around 70%.
Overclocking and Final Tweaks
Overclocking means improving the operating speed of a CPU, GPU, or other hardware components beyond their factory-set limits to achieve better performance. If your motherboard and CPU support it, overclocking is another way to maximize performance. There are tons of tutorials out there if you’re unsure about the process.
After adjusting these settings, you’ll notice smoother gameplay and less stutter, even if you’re trading off some FPS for stability. It’s a compromise, but one worth making for a better gaming experience overall.
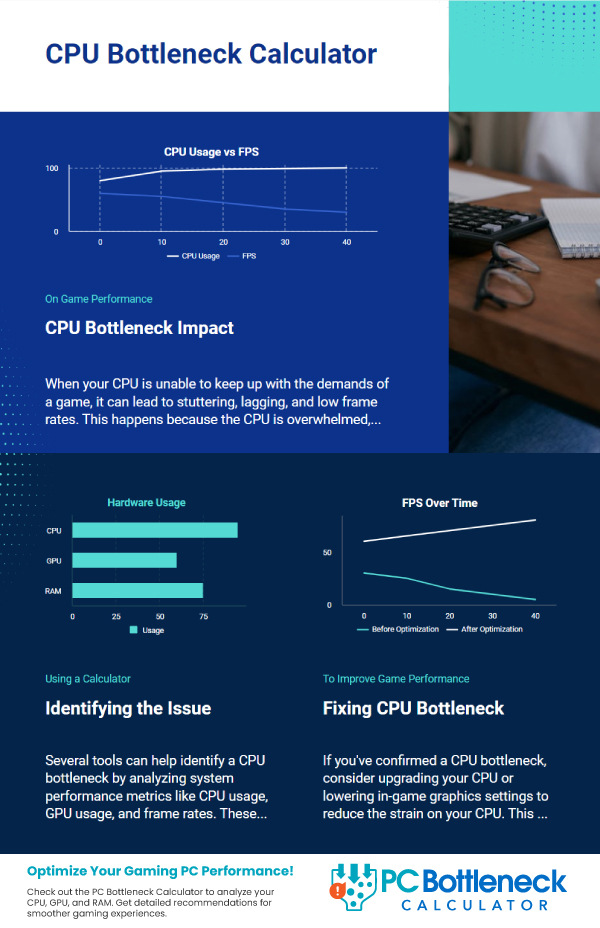
CPU Bottleneck Calculator
Oh, and if you want a quick and easy way to see where your PC stands, pop over to our website and try the CPU Bottleneck Calculator. Enter your CPU and GPU specs, and the game you’re playing, and it will show you if there’s a bottleneck and what percentage of your CPU or GPU is being used. You can make informed decisions on how to tweak your settings or consider hardware upgrades.
By adjusting a few settings and keeping an eye on your PC’s performance, you can minimize or even fix stuttering in games caused by a CPU bottleneck. Sure, you might trade a bit of visual quality for smoother gameplay, but that’s a small price to pay for a better gaming experience.
Additional Tips to Fix Stuttering Due to CPU Bottleneck
1. Adjust In-Game Settings for CPU Load
Some settings directly impact CPU usage. Consider tweaking these options:
- Lower CPU-Intensive Graphics Settings: Features like shadows, reflections, foliage draw distance, and crowd density can put extra strain on your CPU. Try reducing these settings to free up some CPU resources.
- Disable V-Sync: Vertical Sync (V-Sync) can sometimes cause input lag or micro-stutters, especially if your CPU is already under heavy load. Disabling V-Sync might improve performance in some games.
2. Limit Background Processes
Your CPU handles everything that runs on your computer, not just the game. To ensure the game gets as much CPU power as possible:
- Close Unnecessary Background Programs: Close down any programs you don’t need while gaming. This includes web browsers, music players, and software like Discord if you’re not using it for voice chat.
- Disable Startup Programs: Many programs launch automatically when you start your PC and continue running in the background. Disable non-essential startup programs to reduce background CPU usage.
3. Adjust Windows Power Settings
Windows has built-in power management options that can impact your CPU performance:
- Switch to High-Performance Power Plan: By default, Windows might use a balanced power plan, which limits CPU performance to save energy. Switching to the “High Performance” plan ensures your CPU is always running at its best.
To change the power plan:- Go to Control Panel > Power Options.
- Select High Performance.
4. Upgrade Your Cooling Solution
If your CPU is throttling due to high temperatures, this can cause stuttering:
- Improve Cooling: Ensure your CPU cooler is adequate and working properly. Clean out dust from your PC’s fans and heatsinks. Consider upgrading to a more efficient air cooler or liquid cooling solution to keep temperatures down and performance up.
5. Manage Game Priorities
Sometimes, you can adjust how much priority your game gets over other processes:
- Set Game Priority to High: Open the Task Manager (Ctrl + Shift + Esc), find your game under the “Details” tab, right-click, and select Set Priority > High. This tells Windows to allocate more CPU resources to the game.
6. Disable CPU Core Parking
Windows sometimes “parks” CPU cores to save power, which can reduce performance in CPU-bound games:
- Disable Core Parking: Use a tool like ParkControl to disable core parking, which can improve performance in some games by allowing all CPU cores to remain active and available.
7. Check for Malware and Viruses
Malware or viruses can consume CPU resources without you realizing it:
- Run a Full System Scan: Use reliable antivirus software to perform a full scan of your system. Remove any detected threats to free up your CPU resources.
8. Use SSDs for Faster Load Times
While this doesn’t directly reduce a CPU bottleneck, it can improve overall system responsiveness:
- Install Games on an SSD: If possible, install your games on a solid-state drive (SSD) rather than a traditional hard disk drive (HDD). This can reduce load times and minimize stuttering caused by asset loading.
9. Update Your BIOS
An outdated BIOS can sometimes cause compatibility or performance issues:
- Check for BIOS Updates: Visit your motherboard manufacturer’s website to see if a newer BIOS version is available. Be cautious when updating your BIOS, as an improper update can cause system instability.
10. Disable Game DVR and Background Recording
Windows 10 and 11 have built-in features that can affect gaming performance:
- Turn Off Xbox Game Bar and Game DVR: These features can impact CPU performance. Go to Settings > Gaming > Captures and turn off background recording.
Keep Your PC Clean and Lean
Keeping your PC free from unnecessary software, malware, and junk files can help ensure that your CPU is dedicated to the task at hand—your games. Combined with the tweaks and tips above, you can reduce stuttering and enjoy a smoother gaming experience.
By using a combination of these techniques and regularly checking in with our CPU Bottleneck Calculator, you can identify ongoing issues and make the necessary adjustments to keep your games running smoothly.
Feel free to try these additional steps, and hopefully, you’ll see even less stuttering in your games! If you have more questions or need further help, just let us know!